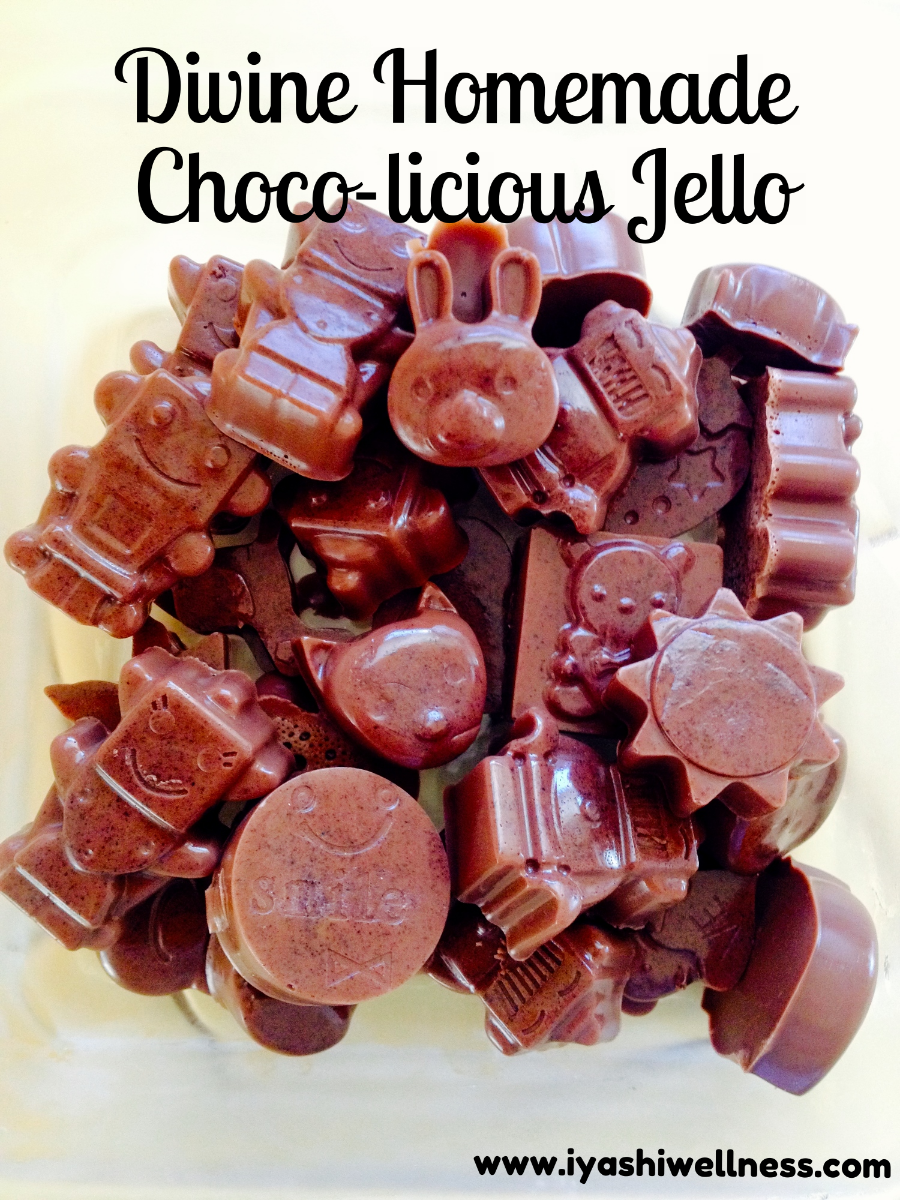
These adorable hearts, robots, animal faces, and stars are homemade chocolate jello made by yours truly! And not only are they super cute to look at and choco-licious to eat, but it is as wholesome goodness as it can get! It’s made from grass-fed gelatin, a highly nutritious food element, and in my case, with panela as well, an unprocessed cane sugar that maintains a large amount of nutrients. And it’s so easy to make!
I was in Colombia earlier this year to visit family, and among other delicious foods, I got to imbibe on one of the national treasures, the chocolate caliente, or hot chocolate. Drinking chocolate (“chocolateh”) always brings me so many good, happy memories of Colombia, so when I was there this winter, I decided to buy the ingredients to make the drink back home in Los Angeles. So I stocked up on unsweetened cocoa powder, panela, and a molinillo. I still needed a hot chocolate pitcher to make the chocolate, so back home in LA, I purchased a traditional handmade ceramic chocolate pitcher (similar to this) at one of the stalls that sells artisanal Mexican goods while visiting Mercado La Paloma. (You can also use this in its place too). With all the necessary ingredients and tools on hand now, I started making my chocolates and choco-licious jellos for my 4 year old son. It was a hit (but of course). To make it more fun for him and I, I just recently purchased these molds – the jellos in the photo are from them, but you can just as well use a glass pan or baking pan to pour the chocolate goo, and then just cut them in to pieces when they’ve firmed up in the fridge. That’s how I started out.
So without further adieu, per patients and friends’ request, here is my recipe:
Just 6 simple Ingredients:
Gelatin powder – (I like this brand and this brand)
Goat milk
Unsweetened coco powder
Panela (aka Jaggery or Piloncillo)
cinammon
clove
INSTRUCTIONS:
Now that it’s getting cooler even here in Los Angeles, I like to start my morning with something warm to drink to gently encourage my digestion to wake up and have a good appetite :-). So I have homemade bone broth, soup, tea, or when I’m feeling decadent, like this past weekend, homemade chocolate caliente. I’ll make enough chocolate so that I can also make the choco-licious jellos from this batch.
I pour about 3 cups of goat milk* in the hot chocolate pitcher and start to heat it. (Or 1 cup of milk per cup of hot chocolate). Don’t let it boil, just warm up the milk nice and hot. With the molinillo inside, I pour in 3-5 tablespoons of the unsweetened cocoa powder and start to whisk it. (The more chocolate, the thicker the chocolate.) (You can also of course use a regular whisk or blend the milk and chocolate in a blender. I just like this ritual of using a molinillo and making chocolate in a ceramic pitcher.) I throw in a stick of cinnamon and maybe 2-3 pieces of cloves for that added delicious hot and fragrant spices. I break apart the panela and start throwing in pieces, stirring and taste-testing constantly as I don’t like my chocolate sweet. I’m actually not a “chocolate” person, but when I do eat (or in this case drink) it, I like mine more bitter, so the less the sugar, the happier me. I keep whisk/stirring. Once thecocoa powder and panela have melted completely, the spices are nice and fragrant, and the milk has frothed up from all the molinillo whisk/stirring, I then pour the steaming chocolate caliente into two mugs – one for me and one for my son – and set it aside to drink later.
Now, while the hot chocolate is still hot in the pitcher and heat on medium-low, I then pour in about 2-3 tablespoons of grass-fed beef gelatin powder, slowly, stirring constantly so that the gelatin doesn’t clump up. I keep whisk/stirring until the gelatin has completely melted into the hot chocolate.
To the side, I have my molds all laid out. The molds are on wider baking pans or even a cutting board so that I have a flat, hard surface under the molds for easy transport from counter to fridge.
Once the gelatin has completely melted, I turn off the fire and pour the hot chocolate into the molds. Be sure to remove the cinnamon and clove while pouring into the molds.
Place the filled molds into the fridge, and in an hour or two, the jellos are, voila! ready!! Remove the jellos from the mold and replace in airtight container so that the jellos don’t dry up.
Lasts in fridge easily up to a week (though with something this delicious, they rarely last that long!).
This treat, I let my son eat a good amount (up to about 6-8 pieces) a day because I know he’s getting so many wholesome nutrients from these little jellos. And I know how much sugar has gone into it, which is minimal, so I don’t fret about the sugar content. Now that’s he’s a little older, he helps me make it, too, so he’s learning measurements, cooking, pouring, whisking, taste-testing, and being patient until they are ready (though he gets to drink that little mug of chocolate too!) What a win-win combo!
And just in time for the Christmas festivities. If you buy Christmas-theme molds, I bet your jellos will be a hit at the next holiday party!
If you try it, let me know how it goes!
*You’re welcome to use cow’s milk if you’re not sensitive to cow’s milk.
